

From Spring Boot 3.x onwards we can't use the old dependencies like Spring Fox Swagger & Spring Fox Swagger UI.
We have an OpenAPI Swagger in place of this and to get started, add the following dependency to your pom.xml file.
   <dependency>
      <groupId>org.springdoc</groupId>
      <artifactId>springdoc-openapi-starter-webmvc-ui</artifactId>
      <version>2.2.0</version>
   </dependency>
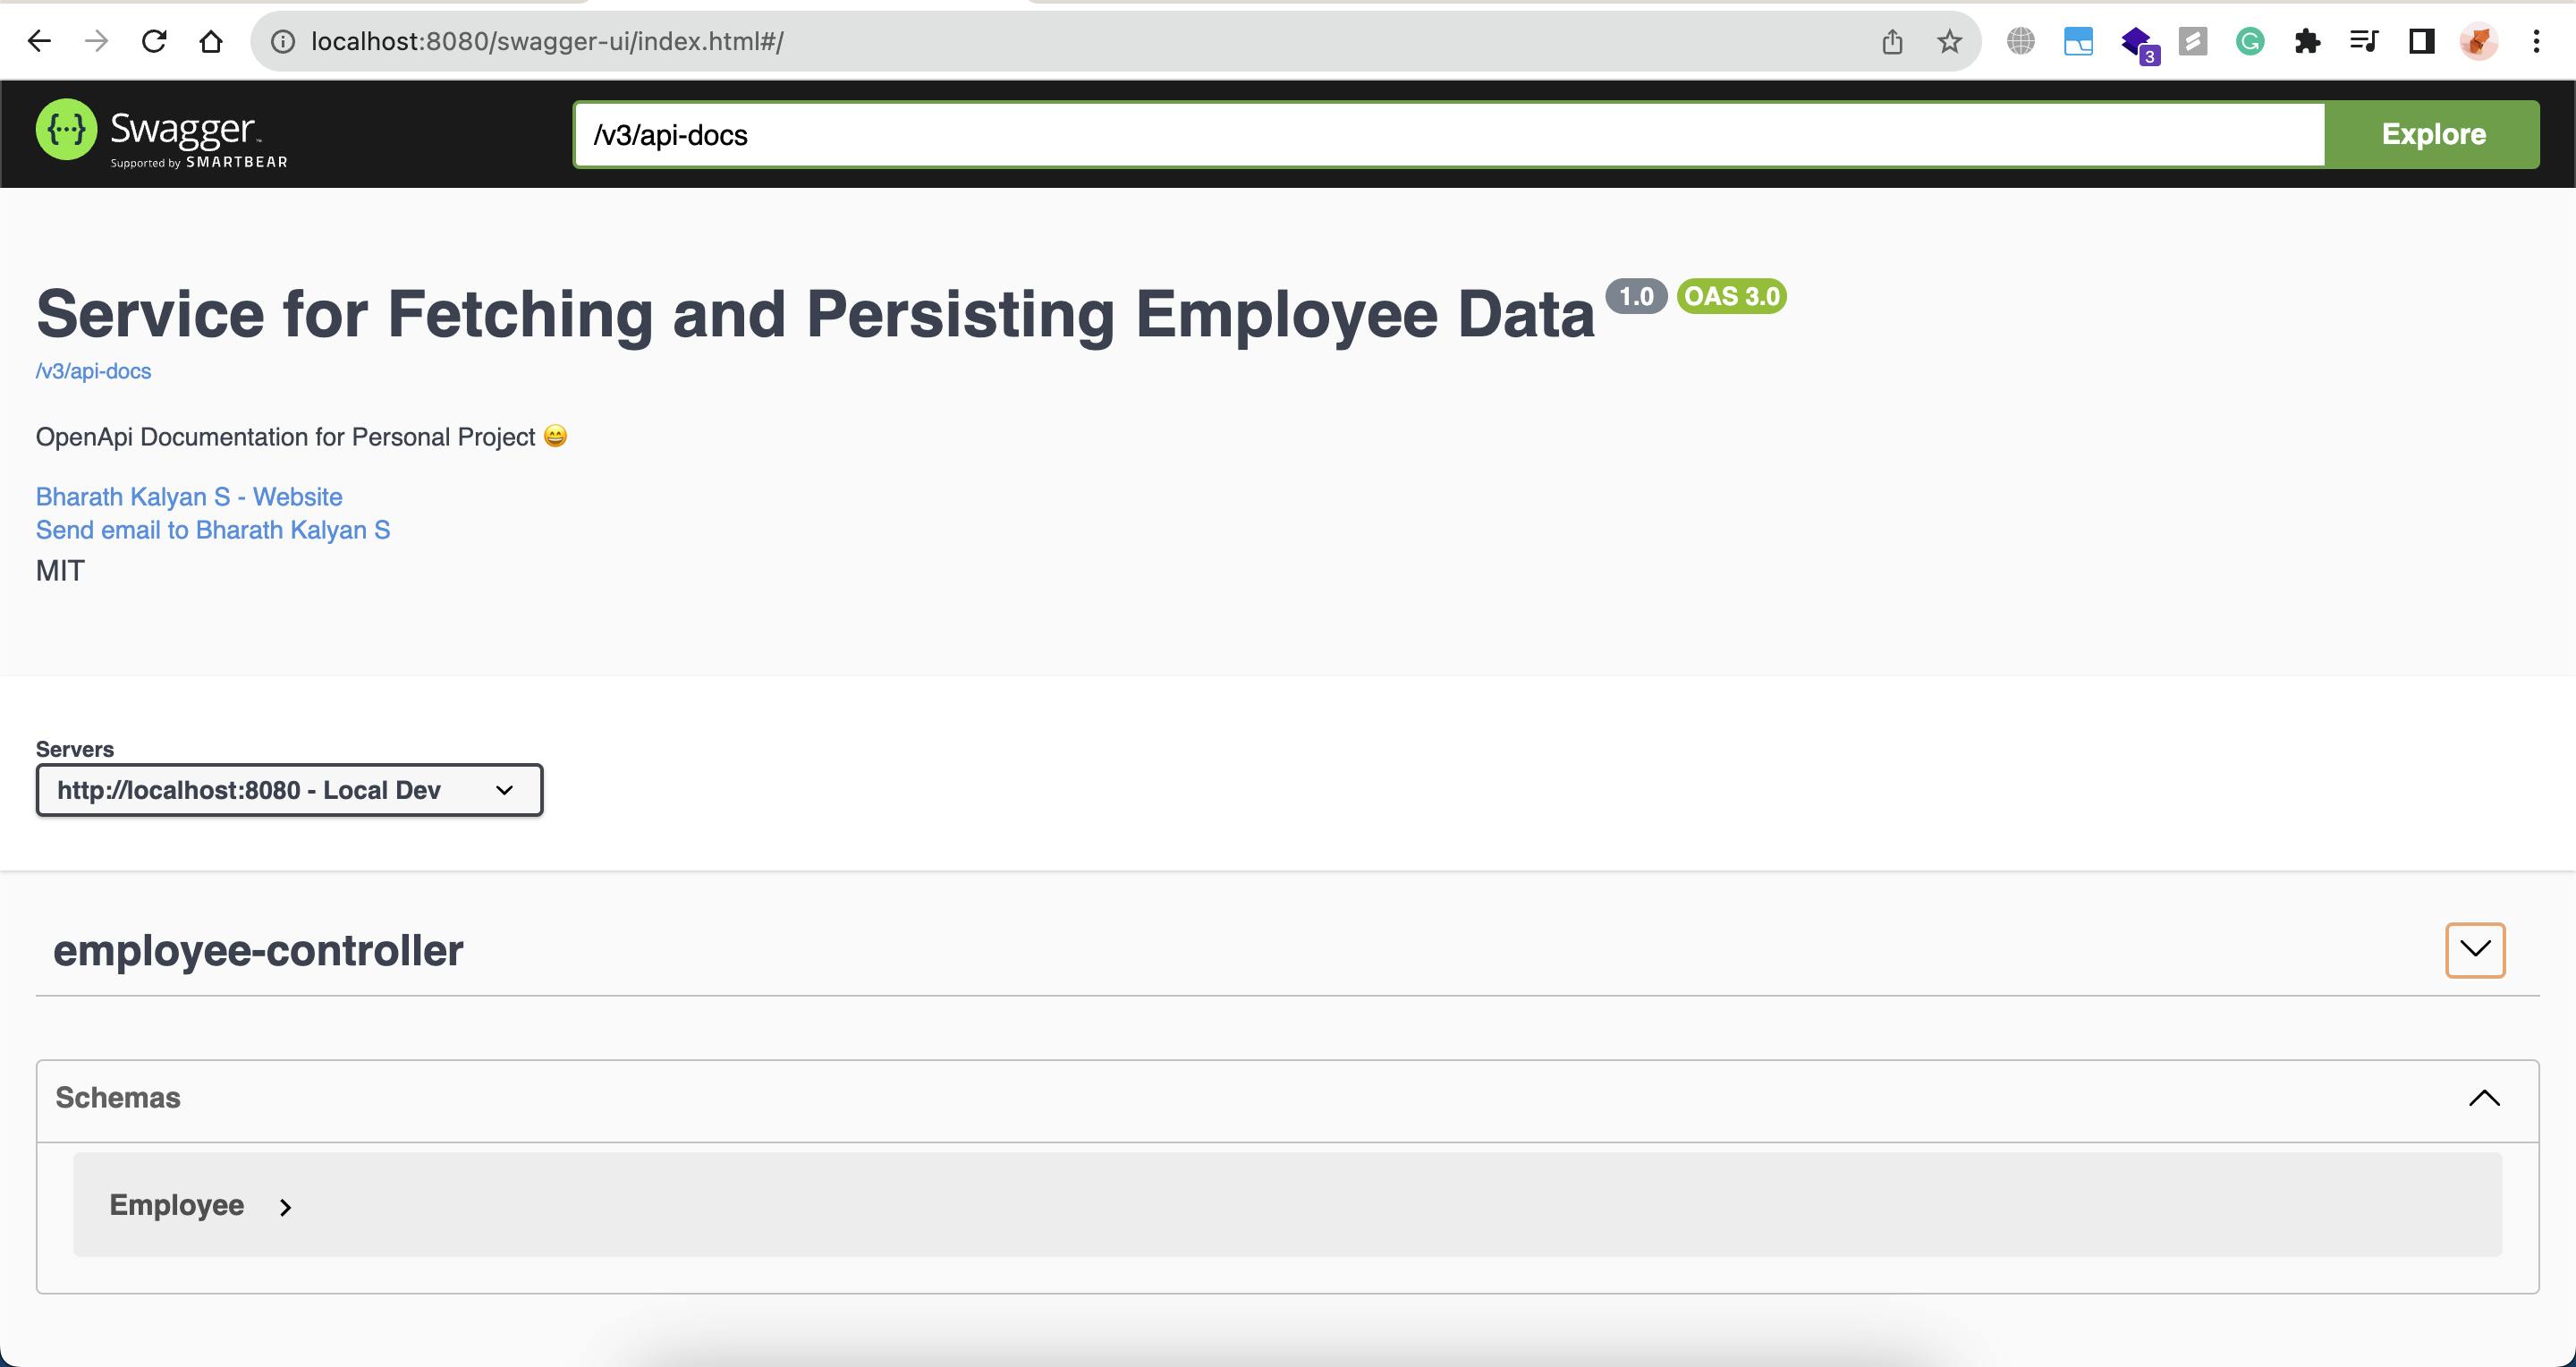
Once you add this, you can access the swagger on

- To customize details, for example, to change the definition, versions, etc. we must hardcode these values inside the spring boot application using annotations.
OpenApi Configuration
Let's configure the OpenApi details, which I have previously mentioned above.
Create a new Java class called OpenApiConfig inside any package(use config).
Use the following code and change accordingly.
import io.swagger.v3.oas.annotations.OpenAPIDefinition;
import io.swagger.v3.oas.annotations.info.Contact;
import io.swagger.v3.oas.annotations.info.Info;
import io.swagger.v3.oas.annotations.info.License;
import io.swagger.v3.oas.annotations.servers.Server;
@OpenAPIDefinition(
info = @Info(
contact = @Contact(
name = "Bharath Kalyan S",
email = "sbharath25@gmail.com",
url = "https://twitter.com/bharathkalyans"
),
description = "OpenApi Documentation for Personal Project 😄",
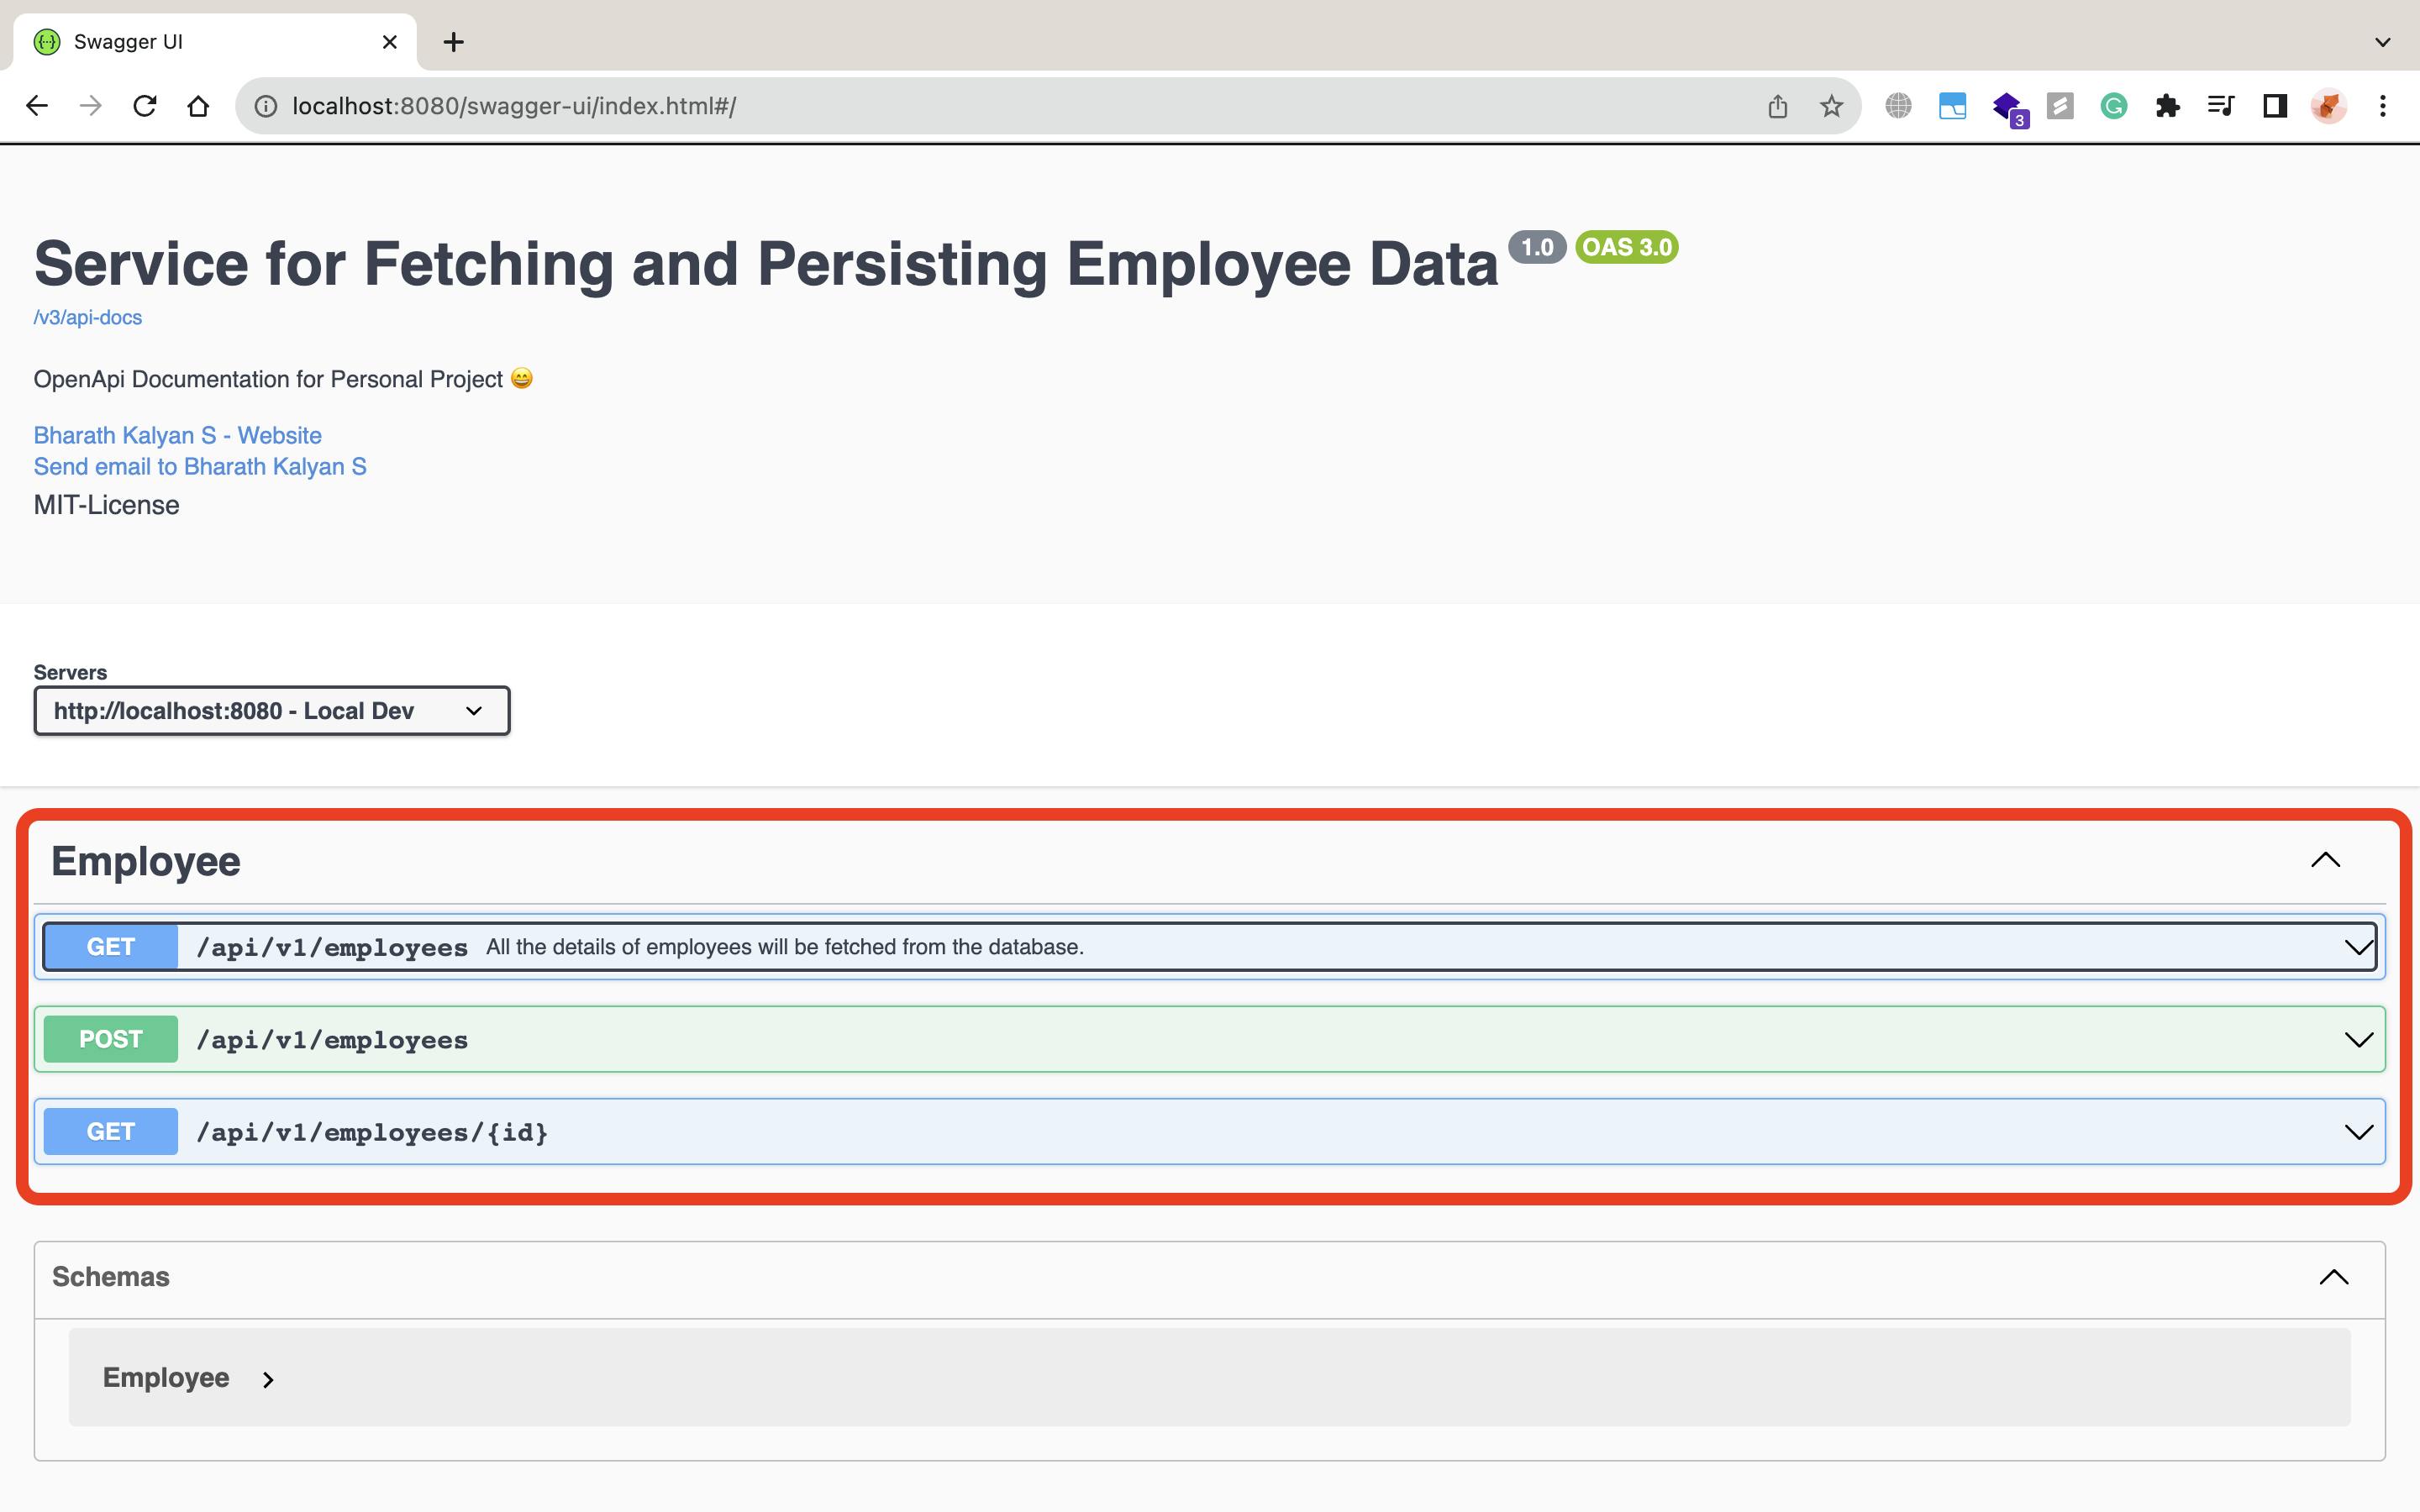
title = "Service for Fetching and Persisting Employee Data",
version = "1.0",
summary = "Add summary of your Service",
license = @License(name = "MIT-License")
),
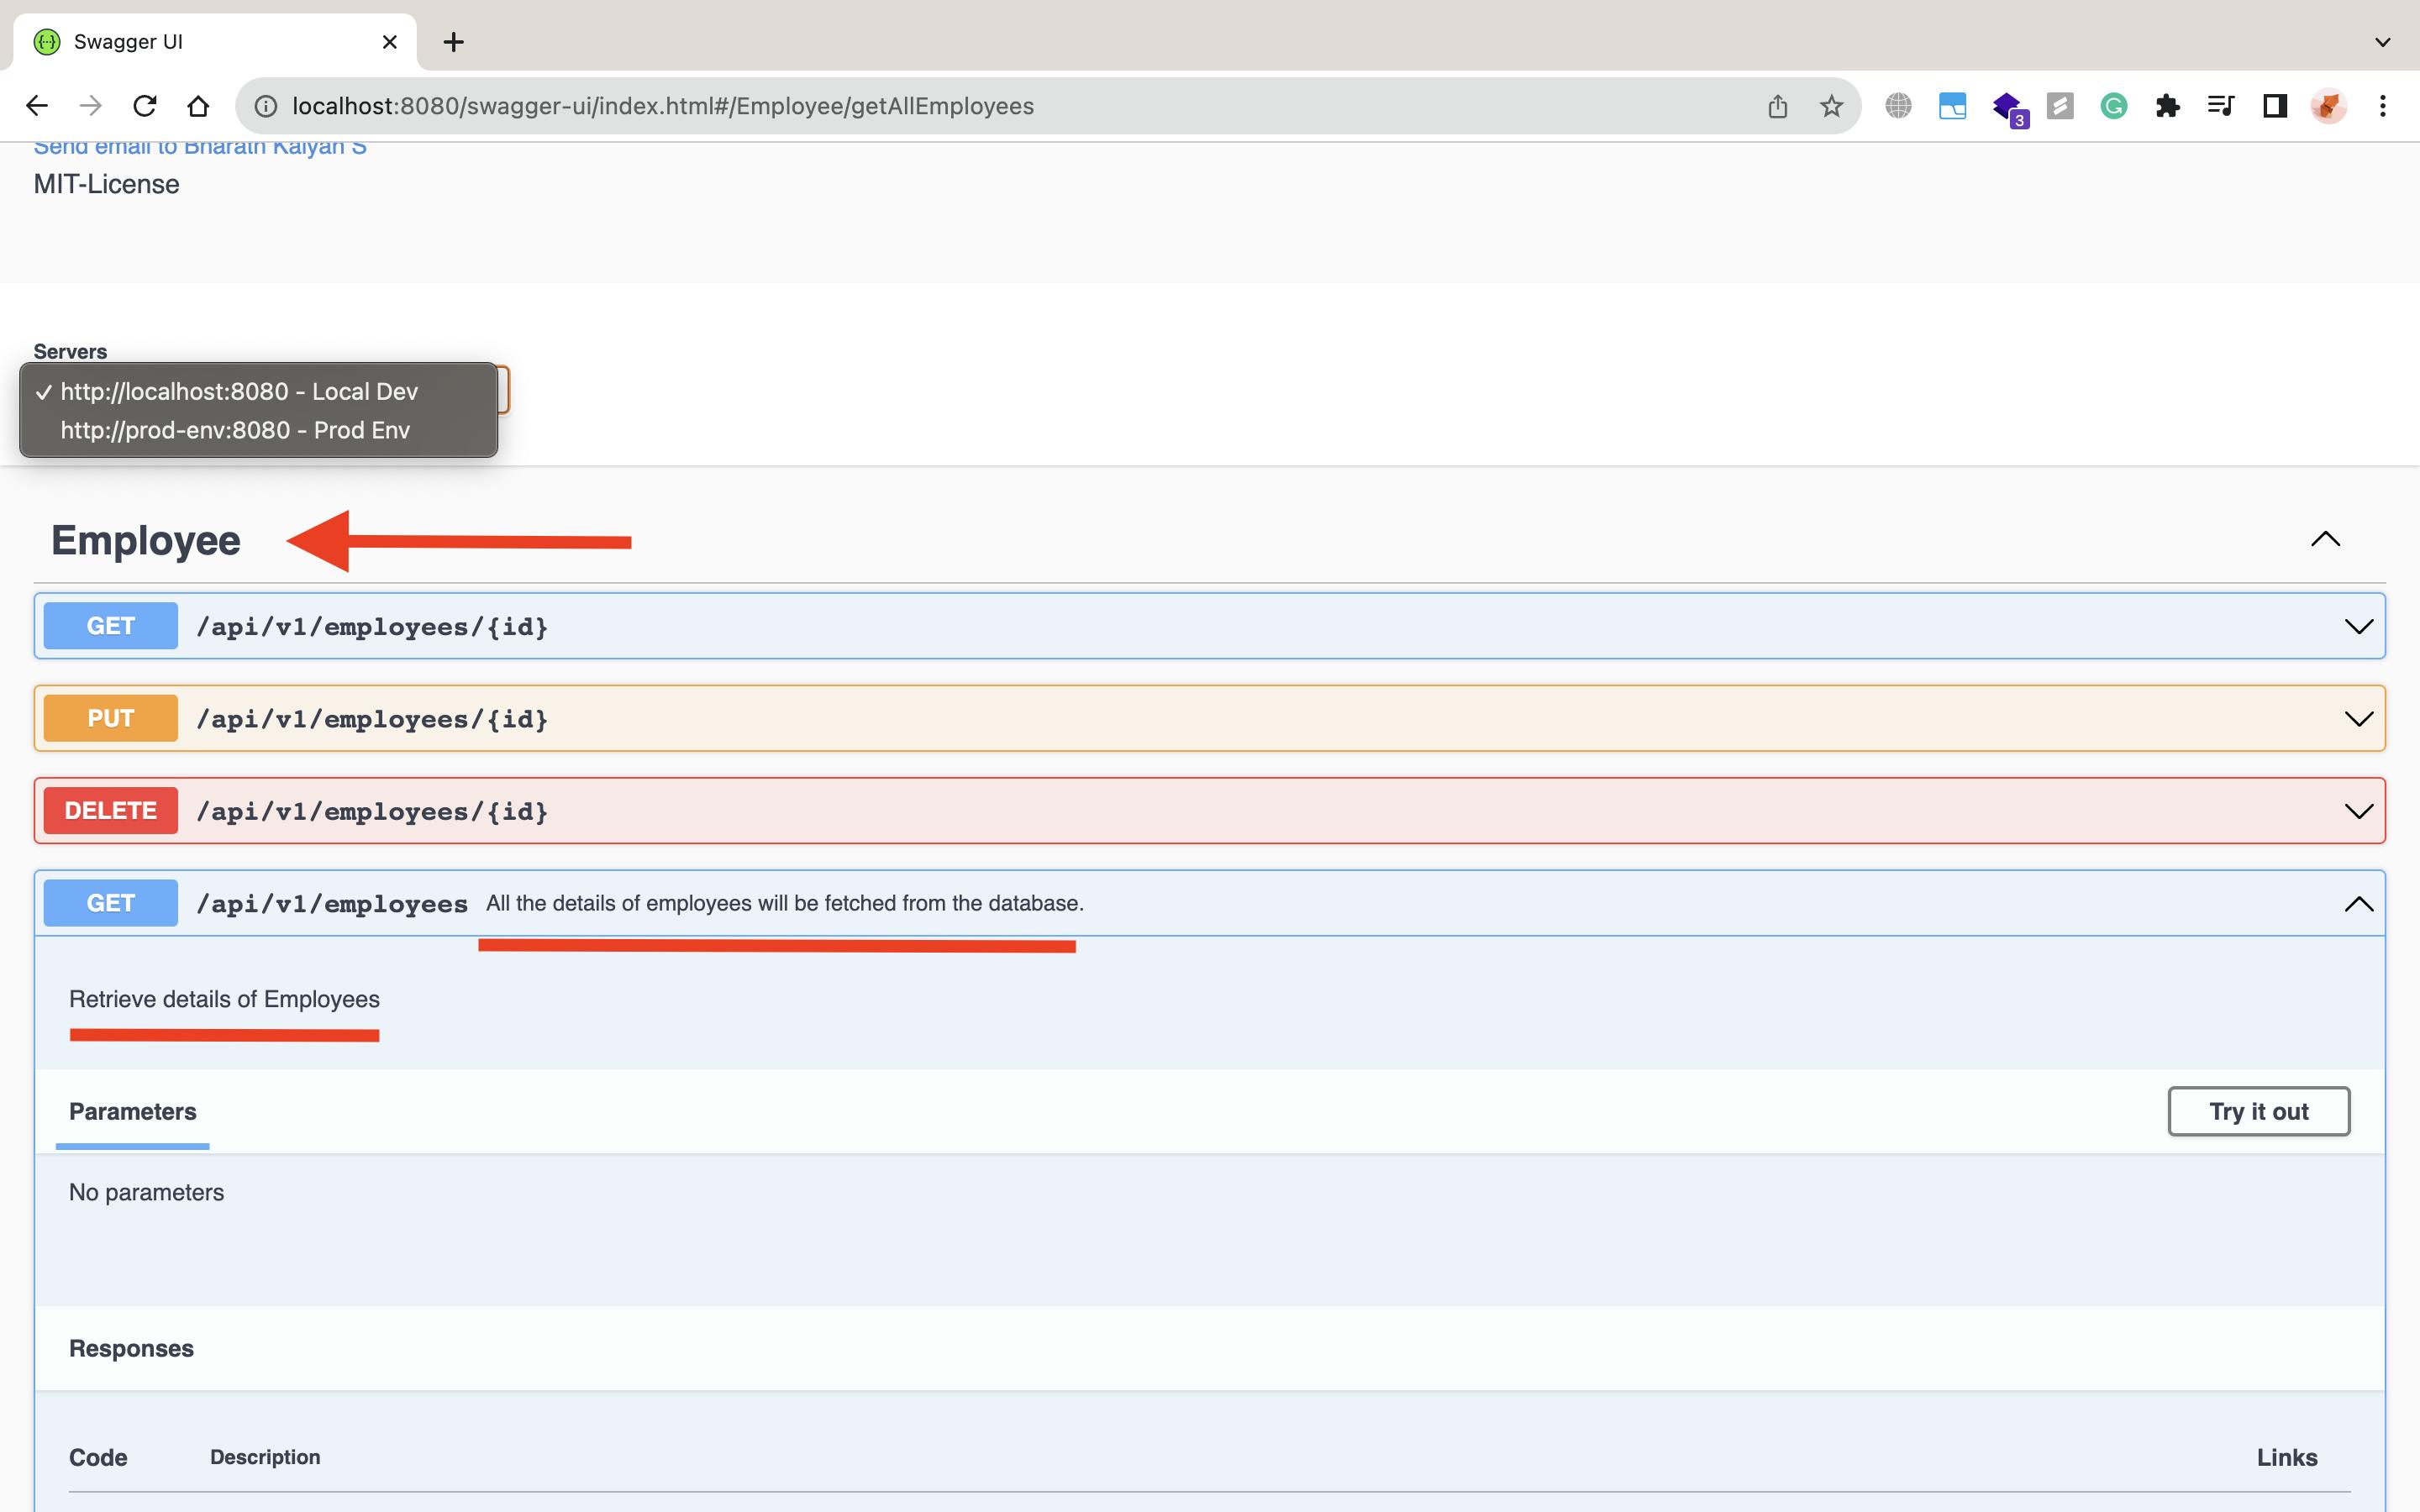
servers = {
@Server(
description = "Local Dev",
url = "http://localhost:8080"
),
@Server(
description = "Prod Env",
url = "http://prod-env:8080"
)
}
)
public class OpenApiConfig {
}
- You can change the details as per your requirements.
Customizing Controller Names and Endpoints
- To customize a particular controller, we will be using @Tag and @Operation for renaming and adding summary, description, etc. for the endpoints.
@RestController
@RequestMapping(value = "api/v1/")
@Tag(name = "Employee")
public class EmployeeController {

    @Autowired
    private EmployeeService employeeService;

    @GetMapping("/employees")
    @Operation(
            description = "Retrieve details of Employees",
            summary = "All the details of employees will be fetched from the database.",
            responses = {
                    @ApiResponse(
                            responseCode = "200",
                            description = "Success"
                    ),
                    @ApiResponse(
                            responseCode = "404",
                            description = "Unable to Employees Fetch / Invalid EndPoint "
                    )
            }
    )
    public List<Employee> getAllEmployees() {
        return employeeService.getAllEmployees();
    }
}

Hiding Controllers or Endpoints
To hide any controller or any endpoint, we have to use @Hidden annotation.
To hide the controller, annotate it above the class name, and to hide any endpoint annotate it above the method name.
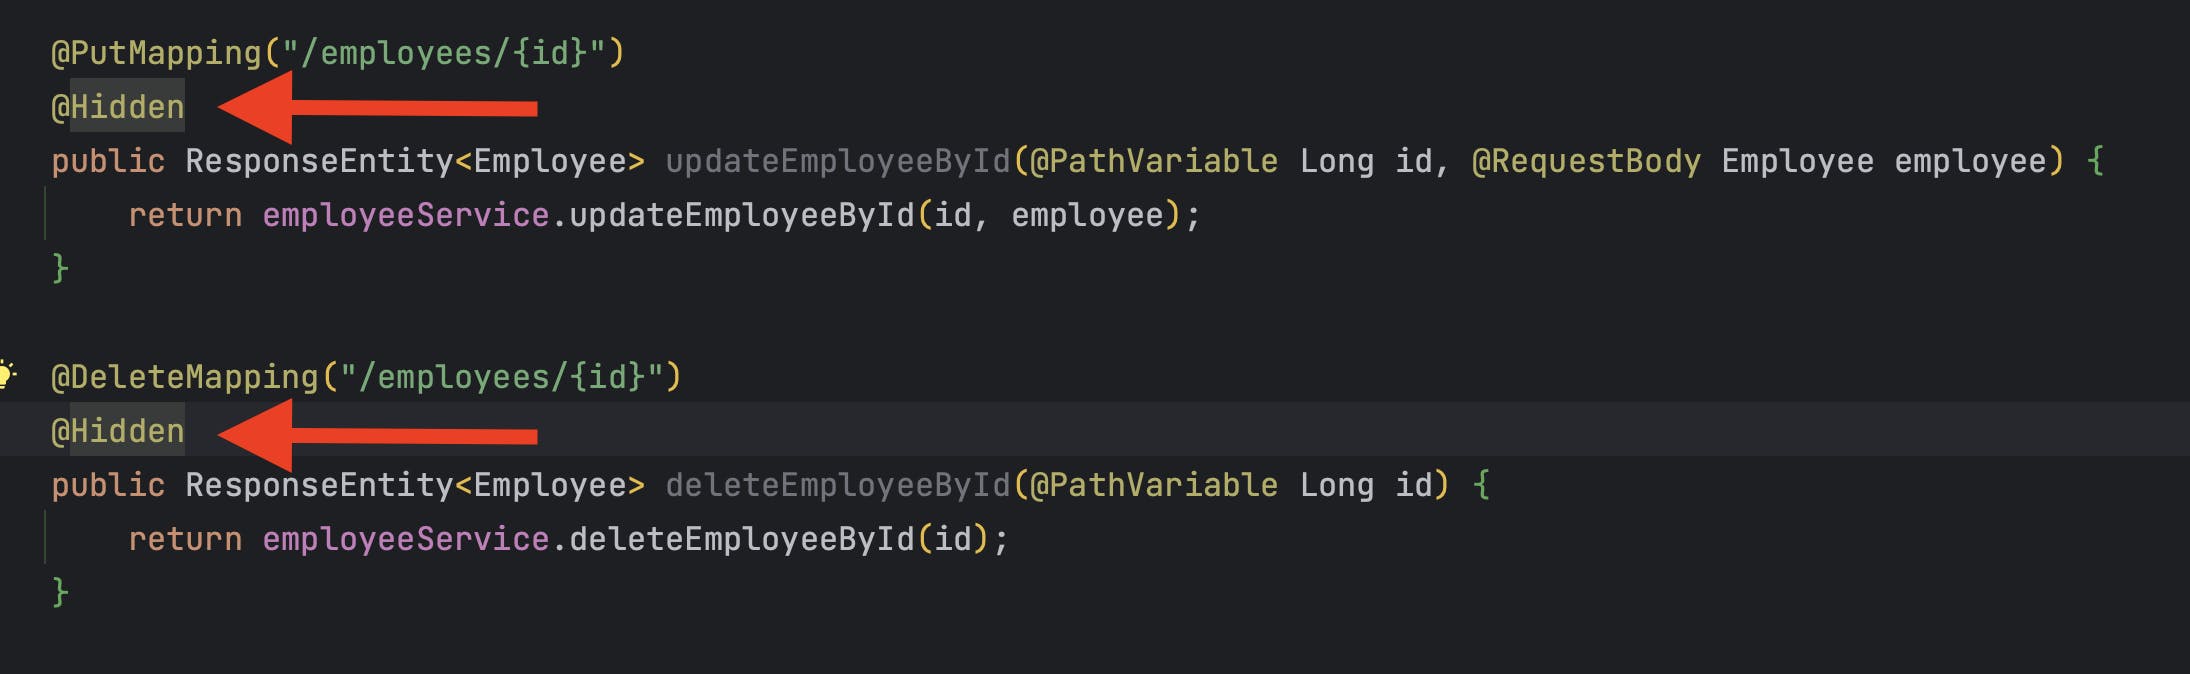
Both put and delete mappings will be hidden to the client/user.
- Swagger is a great tool when you are integrating these REST APIs into your front end. It helps the frontend team have a cleaner look and get good insights about the APIs.
Play around with it by referring to the official documentation https://springdoc.org/
- I hope you liked this blog, will be writing a blog on how to use Swagger with Spring Security as well which will be a continuation of this blog.